Screenshots are very important and vital tools to have on your system. They may be used for troubleshooting problems, sharing information, creating documentation, or capturing important information. Thankfully, from native Windows 10 and 11 options to third-party tools, there are a lot of ways to take screenshots on your devices. For this guide, we have researched every possible solution. Let’s take a look at our findings and hope you are able to pick the best practical option for you. Let us get to it.
Table of Contents
5 Ways to take screenshots on Windows
1. Using the Snipping Tool ( Windows 11 )
The Snipping Tool is a screenshotting solution native to Windows 11. The simple but powerful tool may capture specific screens or window regions, annotate your diagrams, and save images in a range of formats. It even has a record function that lets you record choosing parts of your screen. To use the tool, follow the steps below.
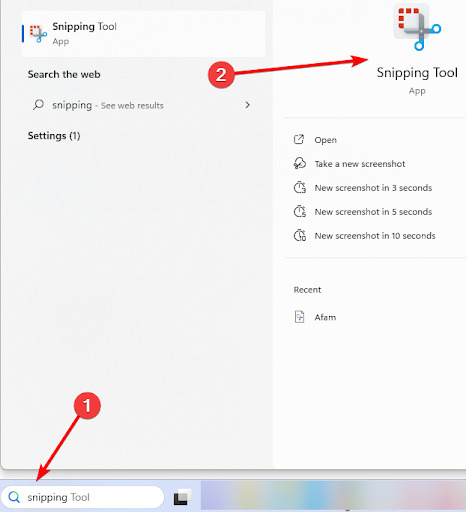
Step 1. Click the Taskbar’s magnifying lens, type snipping, and click on the Snipping Tool.
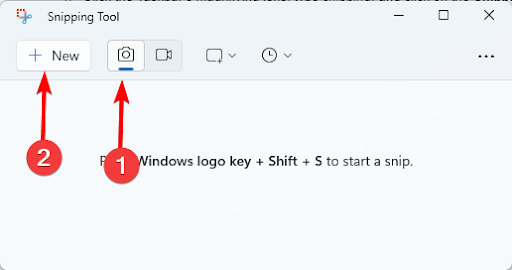
Step 2. Click the camera icon, then click New.
Step 3. Drag the cursor over the area to include in your screenshot and release it to take the screenshot.
Step 4. Optionally, can press Window + Shift + S to take a screenshot using the Snipping Tool.
Bonus tip: You can also press the video icon and click New to make a screen recording.
2. The Snip & Sketch Tool ( Windows 10 )
If you use a Windows 10 device rather than the snipping Tool, you may opt for the Snip & Sketch tool. This is also a built-in utility, and in addition to taking screenshots, it allows you to make annotations as well. It replaces the Snipping Tool introduced in Windows 7. With this tool, you can choose Rectangular Snip, Free Form Snip, Window Snip, and Full-Screen Snip. Here is how to use Snip & Sketch.
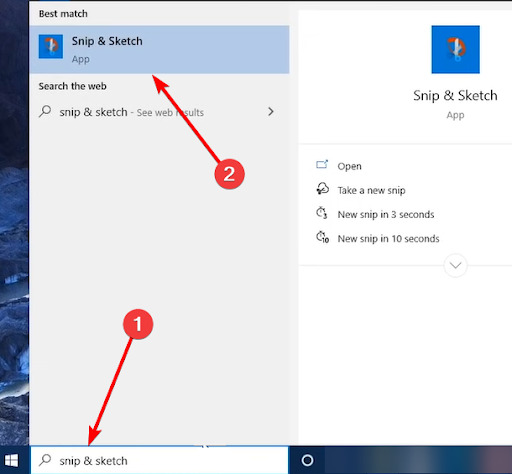
Step 1. Click the search box of the Taskbar, type snip, and select the Snip & Sketch tool.
Step 2. Click the New button.
Step 3. Select any of the four icons at the top to snip representing Rectangular Snip, Free Form Snip, Window Snip, and Full-Screen Snip.
Step 4. Optionally, you may use Windows + Shift + S to take a screenshot without first launching Snip & Sketch.
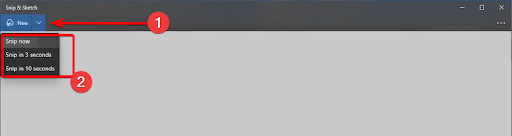
Step 5. Alternatively, expand the options for snipping by clicking the arrow beside the New button. Select Snip now, Snip in 3 seconds, or Snip in 10 seconds.
3. Using Keyboard Shortcuts
While individual screenshot applications may have unique hotkeys for taking screenshots, on Windows, there are specific keyboard shortcuts that work off the box. We explore a few of our favorites below.
Step 1. The Print Screen Button
When you use the Windows 10 or 11 Prt Sc button to take a screenshot, it will capture the entire screen and copy it to your computer’s clipboard. To use this solution, just press the Prt Sc key on your keyboard.
Step 2. Windows Key + Print Screen
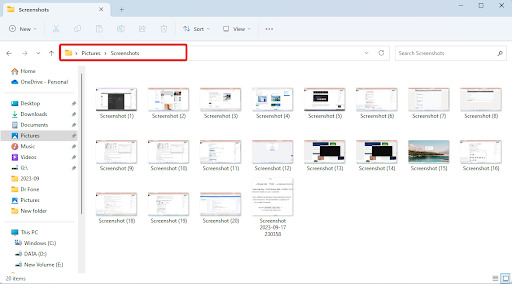
Using the Windows + Prt Sc solution also captures the entire screen. However, it differs from the first hotkey method mentioned in the sense that the captured image is stored in your computer’s picture/screenshot folder shown below.
C:\Users\user\Pictures\Screenshots
Step 3. Alt + Print Screen
When you use the Prt Sc key to take a screenshot, it captures the entire screen and saves it in the clipboard. However, the Alt + Prt Sc option differs slightly because it only takes a screenshot of your active window. So, if you have multiple open windows but need only a screenshot of one, this is the solution to adopt.
Step 4. Power + Volume up (Microsoft Surface Device)
Using the Power + Volume up keys is a valid way of screenshotting on Microsoft Surface devices. However, the only exception is the Surface laptop, where this does not work.
Once you use this hotkey, you should hear a shutter sound, and the captured image will be saved in the computer’s picture/screenshot folder shown below.
C:\Users\user\Pictures\Screenshots

4. Using the Xbox Game Bar to Take Screenshots
Windows Xbox Game Bar is a built-in overlay that gives access to many features without leaving a game window. It allows you to find friends to play games with, chat with other players, record videos, and take screenshots. Follow the steps below to take a screenshot with this feature.
Step 1. Press Windows + G to open the Xbox Game Bar.
Step 2. Click the capture icon on the game bar.

Step 3. Click the camera icon to take a screenshot, or you may use the Windows + Alt + Prt Sc keys to take a screenshot.
5. Using Third-Party Apps to Take Screenshots
If you need to take screenshots on a regular basis, using a third-party tool may be your preferred option. This is because they often offer the most functions and customization alternatives.
There are several options to choose from, and the specific screenshotting steps will vary from vendor to vendor. However, you can read up on the manufacturers, website, or documentation to learn the exact steps that work.
Third-party screenshot tools include,
Where Do Screenshots Go in Windows 11?
In most cases, when you take a screenshot on Windows 11, it goes to the path indicated below:
C:\Users\user\Pictures\Screenshots
However, individual screenshot applications may have separate storage locations, and many third-party tools will allow you to choose your screenshot locations.
That said, you may have forgotten where you stored a screenshot. In this event, open your File Explorer and type .png, or any other possible extension type in the search bar. You will see results for all such files and should be able to get the exact file you are looking for.
Wrap-Up: Enjoying the Flexibility in Screenshots
If you have read to this point, you should be equipped to take screenshots on your Windows 10 and 11 computers.
As you can see, there are several options, and we recommend that you stick with the solution you find most seamless and practical. We are curious to know your choice, so leave us a remark below, letting us know your favorite screenshot solution.
More Windows Tips: