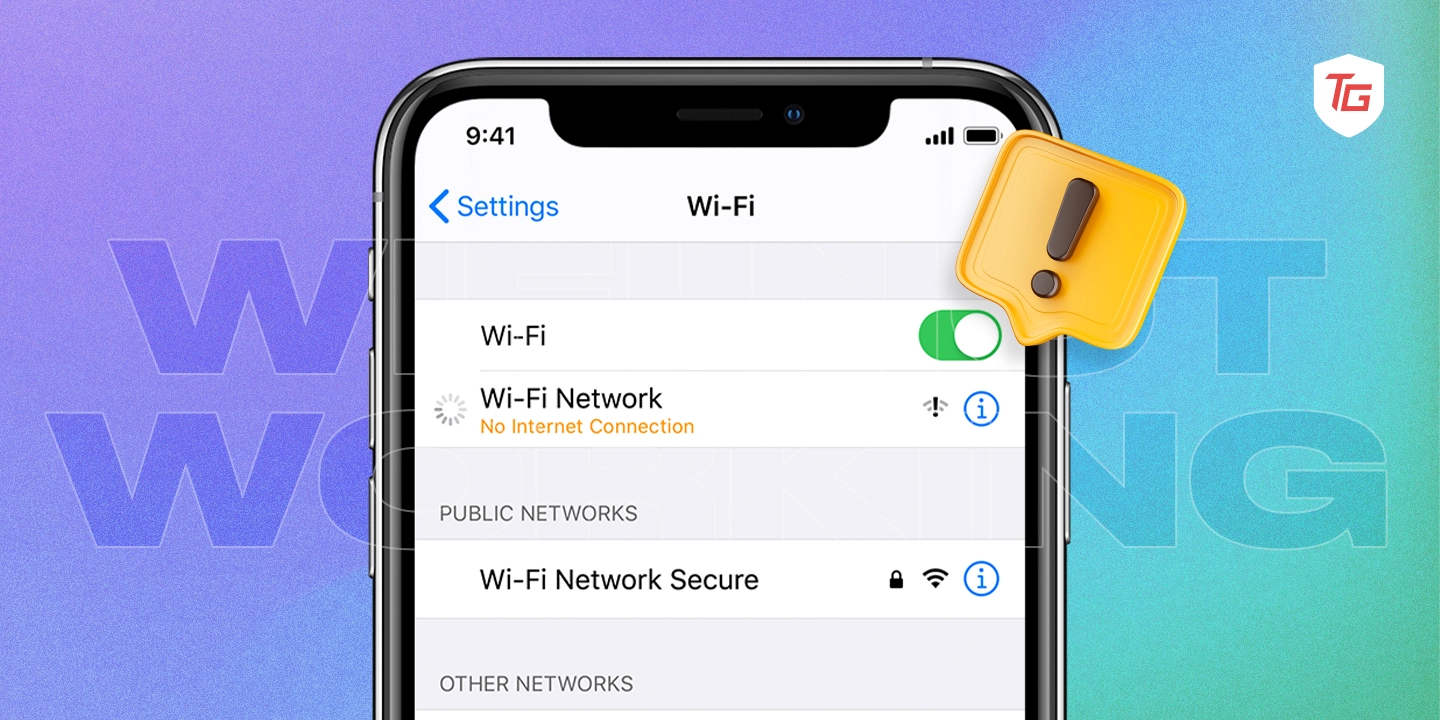
Having problems with your iPhone’s Wi-Fi connection can be excruciating since it is used for numerous tasks. Whether you’re facing slow Wi-Fi speeds, a complete loss of connection, or frequent drops, this guide will help you identify and how to Fix Wi-Fi Not Working on iPhone. Follow these troubleshooting steps to get your iPhone back online and browse smoothly.
Table of Contents
- 1. Turn Off and On your Wi-Fi
- 2. Make Sure Wi-Fi Router is Working Properly or Not
- 3. Keep a Close Proximity With Wi-Fi Router
- 4. Forget and Reconnect to Wi-Fi Network
- 5. Enable or Disable Airplane Mode
- 6. Reboot iPhone and Try Again to Connect Wi-Fi
- 7. Try to Connect Different Wi-Fi Network
- 8. Change your DNS server
- 9. Update Latest iOS Software version
- 10. Turn Off VPN
- 11. Disable Low Data Mode for Wi-Fi Networks
- 12. Reset Network Settings
- 13. Contact Your Internet Service Provider
- 14. Get in Touch with Wi-Fi Routers Support
- 15. Factory Reset Your iPhone
- 16. Contact Apple Support
1. Turn Off and On your Wi-Fi
If you’re experiencing Wi-Fi connectivity issues on your iPhone, it could be due to various factors such as network problems or minor software glitches. The first troubleshooting step you can try is turning off and then on the Wi-Fi on your device. By doing this, your iPhone essentially refreshes its connection and prompts you to search for available networks again once any ongoing connections are terminated.
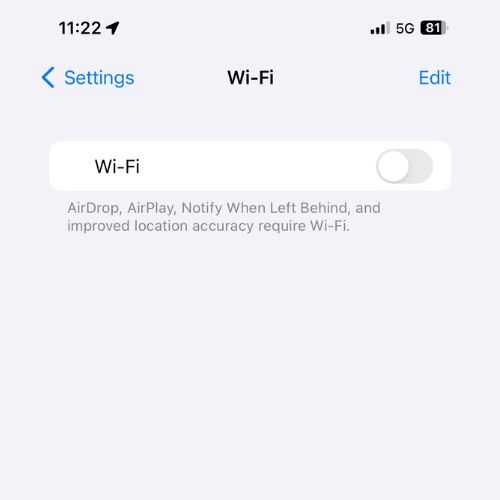
To disable Wi-Fi on your device, access the Control Center by swiping down from the top right corner of your screen. For iPhones with the Home button, swipe up from the bottom of your screen to access the Control Center. Locate the Wi-Fi switch and toggle it off. Give it a few seconds before toggling it back on. Test if Wi-Fi is functioning properly by browsing the web.
2. Make Sure Wi-Fi Router is Working Properly or Not
If you’re facing signal disruptions on your iPhone, there could be a few possible causes. One potential reason is an overheating Wi-Fi router or outdated firmware. Another common issue is network congestion. To resolve the problem, first, make sure that your router’s firmware is up to date and that the Wi-Fi connection is plugged in and turned on.
Additionally, check the condition of your router to ensure it’s in good working order and consider updating it if needed. Check out the best Wi-Fi routers for Home and Office Use.
3. Keep a Close Proximity With Wi-Fi Router
The Wi-Fi signal becomes weaker as you get further away from the router. Walls can also interfere with the signal. Keeping your router close reduces the likelihood of interference and signal drops by ensuring a strong and consistent signal.
4. Forget and Reconnect to Wi-Fi Network
It is common for your iPhone’s memory to become cluttered with network settings over time, resulting in confusion when trying to reconnect. If you forget and reconnect to the network, your iPhone will establish a new connection, which can be more reliable, clearing the old settings. Here’s how to forget a Wi-Fi connection.
1. Open the Settings app and tap on Wi-Fi settings.
2. Tap the “i” icon next to the connected Wi-Fi device.
3. Finally, tap the Forget This Network option to disconnect it.
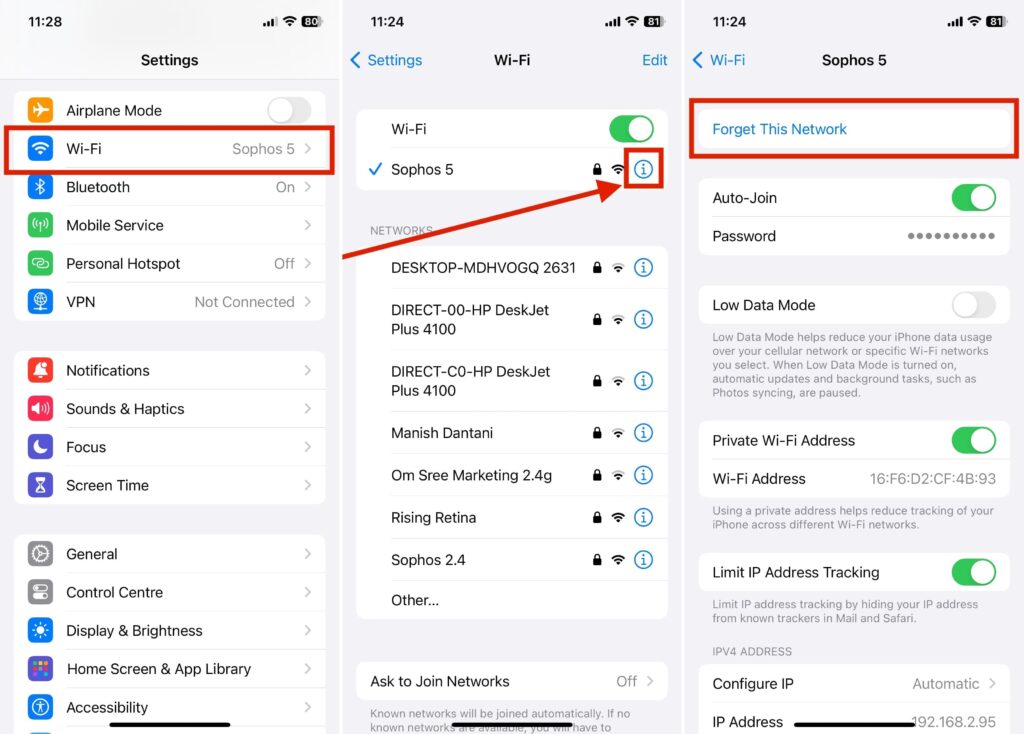
Tap the same Wi-Fi connection and enter the security password to reconnect the device.
5. Enable or Disable Airplane Mode
Using the Airplane Mode resets all wireless connections on and off, including Wi-Fi. In case of a minor problem with the network, this can be helpful. Essentially, it’s like restarting the wireless functions of your iPhone, which often resolves connection issues.
How to turn airplane mode on or off on iPhone:- Open the Control Center, then tap the Flight icon to activate this mode. After a minute, tap the same icon to deactivate the mode. Now, let the connection be restored, and then try using Wi-Fi.
6. Reboot iPhone and Try Again to Connect Wi-Fi
Like any device, iPhones can experience temporary software problems that prevent them from connecting to Wi-Fi networks. Often, rebooting your device removes any software glitches and resets it to a clean state, resolving connectivity issues.
Here are the steps for quickly rebooting your device and resolving underlying software problems. After restarting your iPhone, try reconnecting to the Wi-Fi network, it should work now.
7. Try to Connect Different Wi-Fi Network
If you’re having trouble connecting to Wi-Fi, it might be a problem with your Wi-Fi network, rather than your iPhone. When you connect to a different network, you can determine whether the issue is isolated to one network or if it is a broader iPhone issue. If you can access the internet using another Wi-Fi network, you may already have the solution.
8. Change your DNS server
DNS, or Domain Name System, servers play a crucial role in translating web addresses into IP addresses. However, using slow or unreliable DNS servers can result in sluggish or unstable internet connections. To enhance the speed and reliability of your internet connection, consider switching to a faster and more dependable DNS server, such as Google’s.
9. Update Latest iOS Software version
An outdated piece of software may be infected with bugs and have compatibility problems that negatively impact Wi-Fi connectivity. When you update your iPhone’s software, you will receive the latest bug fixes and improvements, which will help resolve Wi-Fi problems.
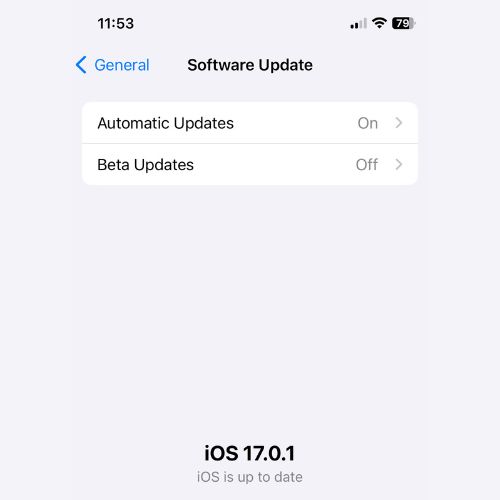
These quick steps will help you update your iOS device to the latest version. Install the latest update on your device and make sure Wi-Fi issues are no longer present.
10. Turn Off VPN
Your iPhone may have trouble connecting to Wi-Fi if you use a VPN and even at certain configurations. When you use a VPN, your internet traffic is rerouted through servers located in different locations, which may cause connection problems.
How to turn off VPN on iPhone:
1. Open the Settings app on your iPhone.
2. Tap on VPN settings.
3. Finally, toggle off for VPN Status.
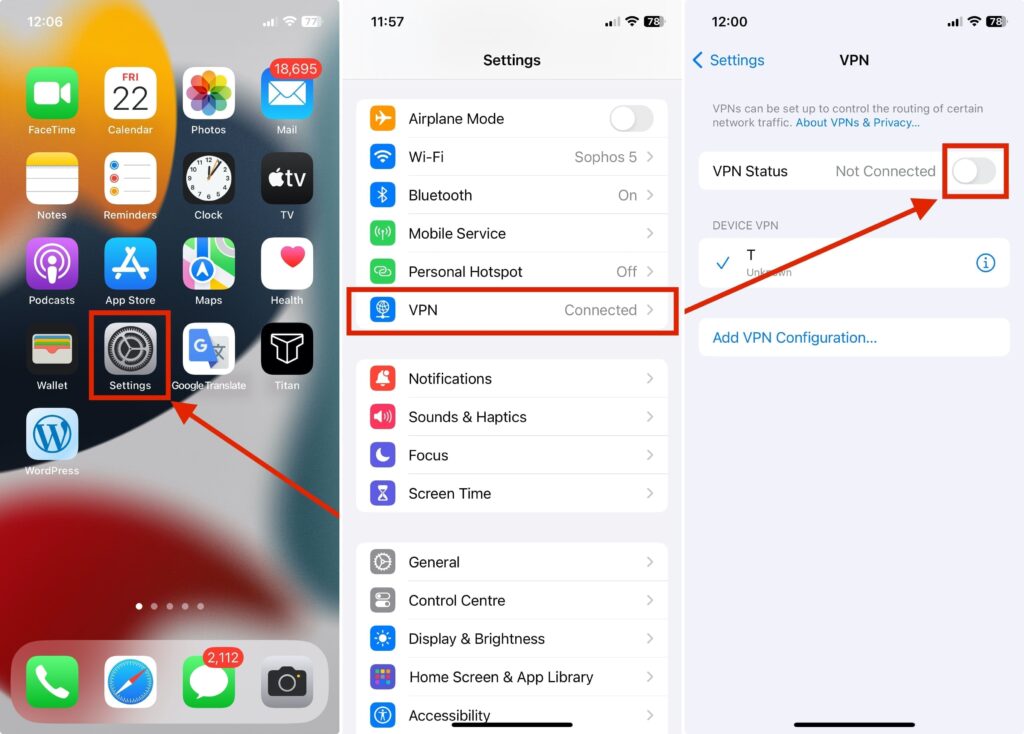
If your Wi-Fi works fine without the VPN, you may need to adjust its settings or contact your VPN service provider for assistance. How to setup VPN on iPhone through an app or manual configuration.
11. Disable Low Data Mode for Wi-Fi Networks
The Low Data Mode on your iPhone helps you reduce the amount of data you consume over the network. It may save you data on your Wi-Fi network plan, but it may also affect your Wi-Fi network activity, causing connectivity issues. The Low Data Mode on iPhone can be disabled specifically for Wi-Fi networks, so you can enjoy smoother Internet browsing when on Wi-Fi.
1. Open the Settings app and visit Wi-Fi.
2. Tap “i” next to the connected network.
3. Lastly, toggle off for Low Data Mode.
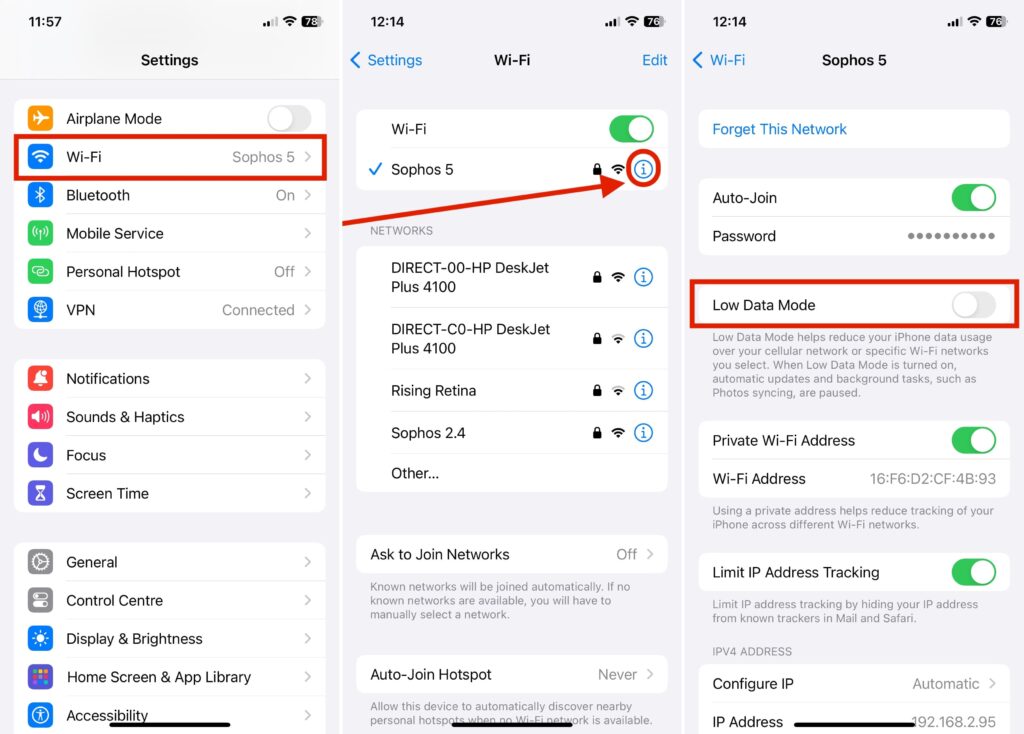
While browsing the web over Wi-Fi, you will no longer experience slow internet speeds.
12. Reset Network Settings
It is possible for your network settings to become cluttered or corrupted over time, which can impede your connection. All network configurations are erased and returned to their default state when network settings are reset, which often fixes persistent Wi-Fi issues.
1. Launch the iPhone Settings app on your device.
2. Head over to the General settings.
3. Go to the Transfer or Reset iPhone menu.
4. Then, tap Reset.
5. Finally, choose Reset Network Settings.
If you are asked for your iPhone passcode, enter it. Your Wi-Fi networks will all be reset, as well as your personalized network settings. Following that, connect to your Wi-Fi network again and check if it works now.
13. Contact Your Internet Service Provider
You might be having an issue with your internet service provider (ISP) or with the larger network infrastructure if none of the above steps are working for you. In such a case, it’s worth getting in touch with your Wi-Fi operator to diagnose and resolve the network issues on their end. Contact them via phone or other means and explain the problem with the network, speed, or connection.
14. Get in Touch with Wi-Fi Routers Support
There can be hardware or software issues that affect Wi-Fi routers, just as they do with all other devices. Any router-specific issues should be addressed by the router manufacturer or support staff.
15. Factory Reset Your iPhone
In rare cases, your iPhone’s software can become so corrupted that a factory reset is the only way to resolve deep-seated issues. A factory reset erases all data and settings on your iPhone, essentially giving it a fresh start. This can resolve severe software-related Wi-Fi problems. To wipe your iPhone off,
1. Open the Settings app and visit the General option.
2. Navigate to the end of the screen and tap Transfer or Reset iPhone.
3. Next, tap Erase All Content and Settings.
4. Tap Continue and follow the instructions displayed on the screen.
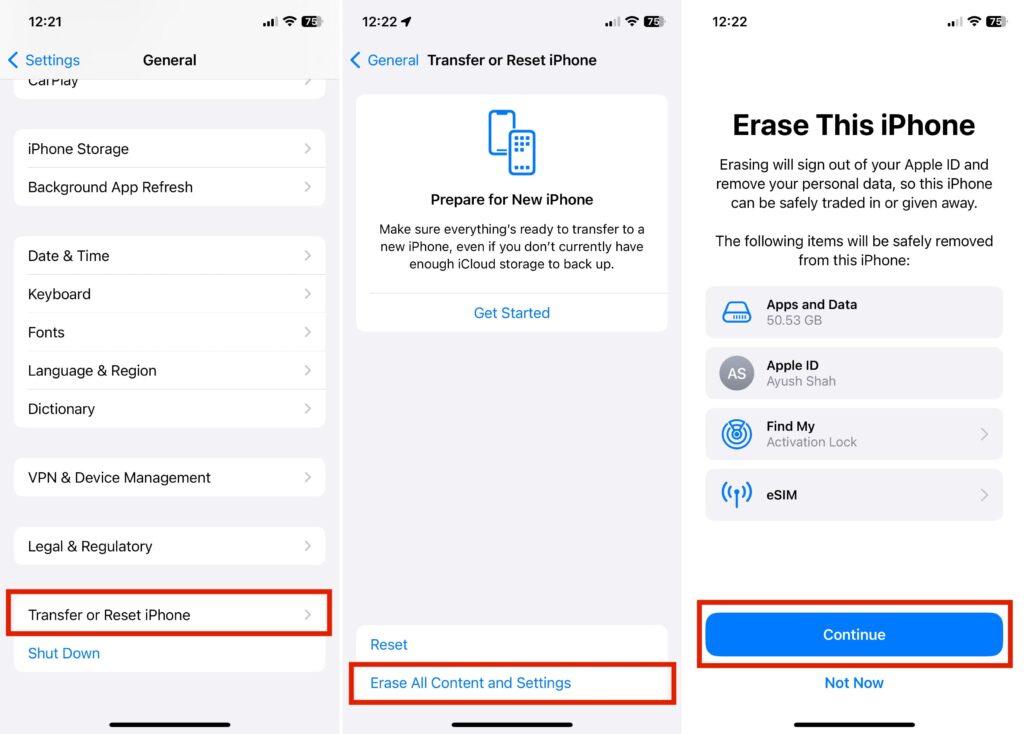
The data on your device will be completely deleted and your device will restart afterward. You will then be able to use and access Wi-Fi without any problems.
16. Contact Apple Support
If you’ve exhausted all your troubleshooting options and the problem still persists, it’s possible that you’re dealing with a hardware malfunction or a more intricate software issue. In such cases, seeking expert assistance from Apple Support is recommended. Their team can provide personalized guidance, diagnose any hardware problems accurately, and offer tailored solutions based on your specific situation.
To contact them, simply visit their official website and choose your preferred method of communication, such as a phone call, chat, or email. Their team will take your issue seriously and provide helpful solutions. If necessary, they may recommend taking your device to a nearby Apple store for further assistance.
Conclusion:
Having reliable Wi-Fi is crucial if your work relies on using your device over an internet connection. With the convenience of doing tasks on your iPhone that were once limited to desktops, encountering Wi-Fi problems can greatly impact your productivity.
No need to worry! Our troubleshooting steps will assist you in resolving the issue promptly. If that doesn’t work, feel free to reach out to Apple Support or your Wi-Fi provider for further assistance with more complex problems.
In case you missed: